
Claude Code Setup Guide: From Installation to Multi-Model Configuration
Master the Essential Developer CLI Tool That’s Taking Silicon Valley by Storm

If you’ve been hearing developers rave about Claude Code—especially after Boris’s recent deep dives on X sharing development insights and power-user techniques—you’re not alone. This command-line tool has become nearly essential in Silicon Valley’s developer toolkit, and when paired with Agent Skills and MCP servers, it transforms into a full workflow automation system.
Here’s what makes this interesting: you don’t need to be a programmer to use it. With the right setup, anyone can become a builder. This tutorial walks you through installation, configuration, and—critically—how to connect multiple AI model providers beyond Anthropic’s Claude.
Let’s get straight to it.
Why Claude Code Matters Now
Claude Code is Anthropic’s CLI product, but the ecosystem around it—MCP servers, skills, integrations—is what makes it powerful. Think of it as the command center for AI-assisted development workflows.
Recent momentum comes from Boris (the creator) actively sharing on X:
Development process breakdowns
Advanced usage patterns
Workflow optimization techniques
Combined with Agent Skills, Claude Code can build complex automation chains that genuinely boost productivity. The barrier to entry has dropped significantly.
Part 1: Installing Claude Code
What You Need First
Before anything else, verify your Node.js version is 18 or higher.
Check by opening Terminal (Mac) or Command Prompt (Windows) and running:
node -v
If you see v18.x or higher (like v25 in my case), you’re set. If not, download the installer from the official Node.js site and install it first.
Installation via npm
Head to the Claude Code GitHub repository. The installation guides for both Mac and Windows are clearly documented. I recommend using npm.
Copy the npm installation command from GitHub:
npm install -g @anthropic-ai/claude-code
Paste this into your terminal and run it.
Once installed, type claude to enter Claude Code. By default, it expects Anthropic’s Claude API configuration. But here’s the challenge: many users—especially in China—can’t access Claude’s API directly.
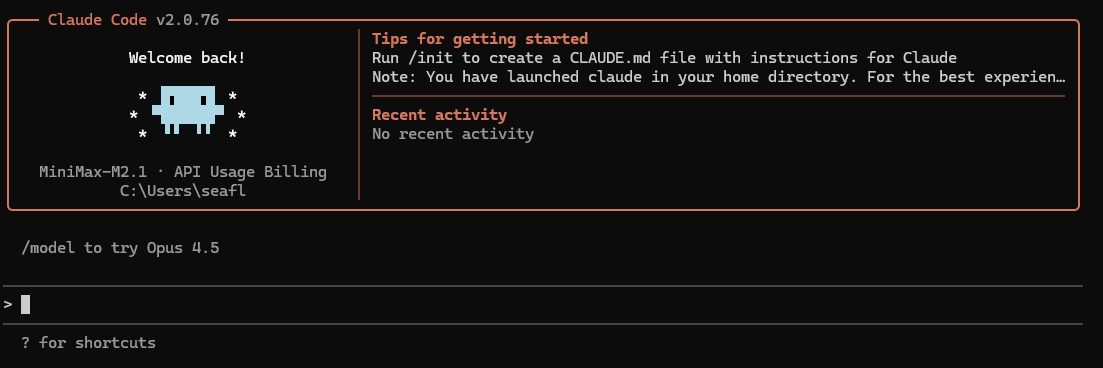
(Here I use MiniMax-M2.1)
That’s where multi-model configuration becomes essential.
Part 2: CC-Switch—The Model Management Solution
The Problem
You want to use Claude Code’s interface and tooling, but you need flexibility to connect different model providers—whether that’s DeepSeek, Minimax-2.1, or GLM-4.7 (which has strong coding capabilities).
The Solution: CC-Switch
CC-Switch (Claude Code Switch) is an integration tool that lets you manage:
Multiple AI model APIs (Claude, DeepSeek, Minimax, Qwen, etc.)
Agent Skills
MCP servers
Even alternative systems like OpenAI Codex and Google Gemini
Installing CC-Switch
Visit the CC-Switch GitHub page. Installation guides are available for both Windows and Mac. You can directly download the installer package for your platform.
Once installed, launch the app. The interface looks clean and functional.
Understanding the Interface
At the top toolbar, you’ll see tabs for:
Claude (corresponding to Claude Code)
Codex (OpenAI’s model)
Gemini (Google’s model)
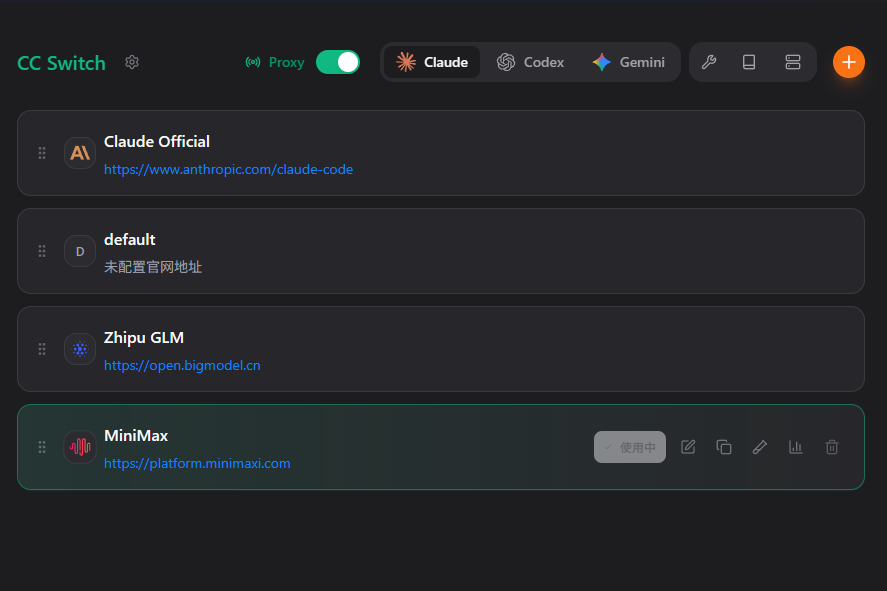
When you select the Claude tab, you’ll find several buttons on the right:
Wrench icon: Claude Skills management—install and configure skills (I’ll cover this in a future tutorial)
Prompt icon: Save and manage reusable prompts
MCP icon: Manage Model Context Protocol servers
Plus (+) icon: Add new model API configurations
Configuring Your First Model Provider
Click the + button to add a new API configuration.
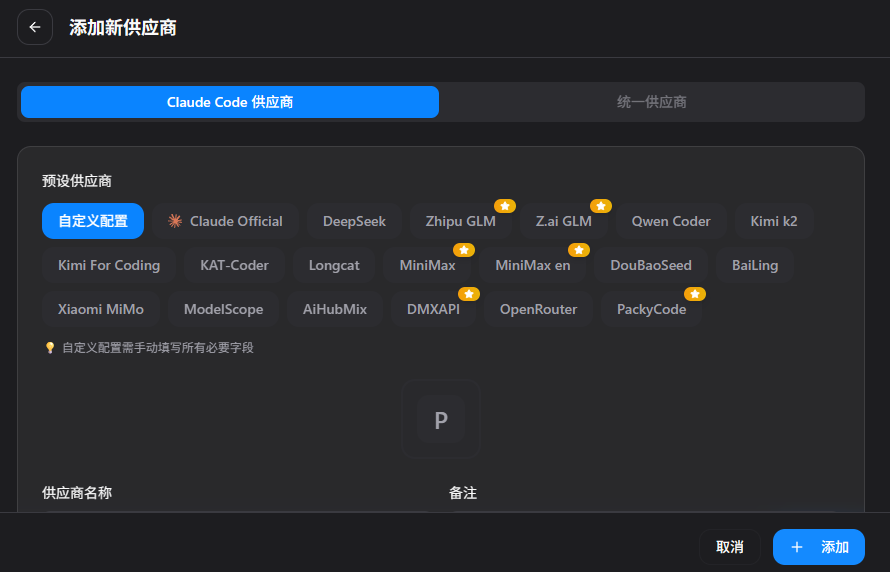
You’ll see a list of supported providers:
DeepSeek
Zhipu (GLM models)
Minimax
Kimi
Qwen (通义千问)
And more
When you select a provider—say, Minimax—CC-Switch pre-fills basic information. You just need to add:
Your API key
Model configuration adjustments
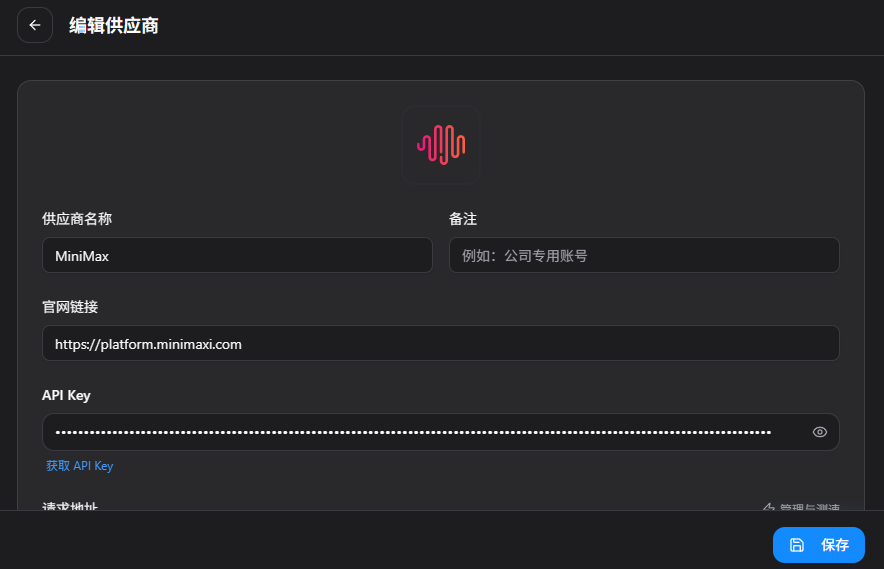
Getting Your API Key
Visit the developer platform for your chosen provider (e.g., Minimax’s developer console), recharge your account, and generate an API key. Copy it into CC-Switch.
Configuring Model Details
For Minimax, the strongest coding model currently is Minimax-2.1. Update all model fields to reference this:
Primary model:
minimax-2.1Haiku equivalent:
minimax-2.1Opus equivalent:
minimax-2.1
(These tiers—Haiku, Opus, etc.—correspond to Claude’s model classification system. Since Minimax only has one main model, use the same identifier across all fields.)
The reasoning model field is optional.
Once configured, click Save.
Activating Your Configuration
Return to the main screen and enable the Minimax API configuration you just created.
CC-Switch automatically updates Claude Code’s environment variables for you. If you want to switch to a different model later, just configure it and toggle the activation.
Part 3: Testing in Terminal
Open your terminal and type:
claude
You should now see the model listed as Minimax-2.1 instead of Anthropic’s Claude.
Test it with a simple prompt:
Who are you? What can you do?
If you get a response, your installation and configuration are working correctly.
Part 4: Using Claude Code in VS Code (For Non-Programmers)
The terminal interface works great for developers, but if you’re not comfortable with command-line tools, VS Code integration is the better option.
Step 1: Install VS Code
Download and install Visual Studio Code from the official site.
Step 2: Install the Claude Code Extension
Open VS Code
Click the Extensions icon in the left sidebar (looks like four squares)
Search for “Claude Code”
Find “Claude Code for VS Code” (verify it’s developed by Anthropic)
Click Install
Step 3: Open or Create a Project
Open an existing project folder or create a new one. Once opened, you’ll see a Claude logo in the top-right corner—this confirms the extension is active.
Step 4: Test the Integration
The configuration automatically syncs from CC-Switch. Try asking:
What model are you?
If CC-Switch is set to Minimax, it should respond with Minimax-2.1.
The visual interface makes everything more intuitive—especially for non-developers who want to leverage Claude Code’s capabilities without touching the terminal.
The Real-World Difference
Before: Limited to Anthropic’s Claude API, blocked access in certain regions, single-model dependency
After: Flexible multi-model support, local or alternative providers, visual interface option, skills and MCP ecosystem ready to use
This setup unlocks Claude Code’s full potential while giving you control over which AI models power your workflows.
What’s Next
This tutorial covered installation and model configuration—the foundation. In future editions, I’ll break down:
Agent Skills: How to build and chain automation workflows
MCP servers: Connecting external tools and data sources
Advanced prompting: Getting the most out of Claude Code’s capabilities
The barrier to entry for AI-assisted development has never been lower. Whether you’re a seasoned developer or just getting started, Claude Code is now accessible and flexible enough to fit your workflow.
If you found this useful, let me know which topic you’d like me to cover next. See you in the next edition.
Subscribe to stay updated on practical AI tools and workflows that actually work.
Good walkthrough for getting started. One thing to add once you've got your setup sorted: if you start stacking hooks (logging, linting, notifications), they'll all run sequentially by default and can seriously slow things down. Adding async: true to fire-and-forget hooks fixes that. Wrote a detailed guide on which hooks to keep sync vs async: https://blog.devgenius.io/claude-code-async-hooks-what-they-are-and-when-to-use-them-61b21cd71aad?sk=40d0b1c86232a799e19b20ba53b8e2c3