
How I Built a Document Translation Tool Without Writing Code: A Vibe Coding Workflow
Vibe Coding Workflows and Methodology Sharing

If you’ve been manually translating PowerPoint presentations for international clients, you know the pain. Translation takes hours. The results need constant refinement. And after translation, you spend even more time fixing text boxes that overlap because English and Chinese have different character lengths.
I looked for tools to solve this. Nothing fit. So I built one myself using vibe coding with GPT-5.3-Codex. The result is translayout - a document translation and layout optimization tool that’s now in production.
Here’s what makes this interesting: I didn’t write the code myself. I orchestrated it.
The Problem: Translation Is a Multi-Layered Pain Point
Before building anything, I identified the specific workflow problems:
Translation time: Hours per presentation
Quality issues: Generic translations miss domain context
layout destruction: Text overflow and overlapping boxes after translation
Repetitive work: Same process for every client deck
The core insight: this isn’t just a translation problem. It’s a translation-plus-layout problem that existing tools don’t solve together.
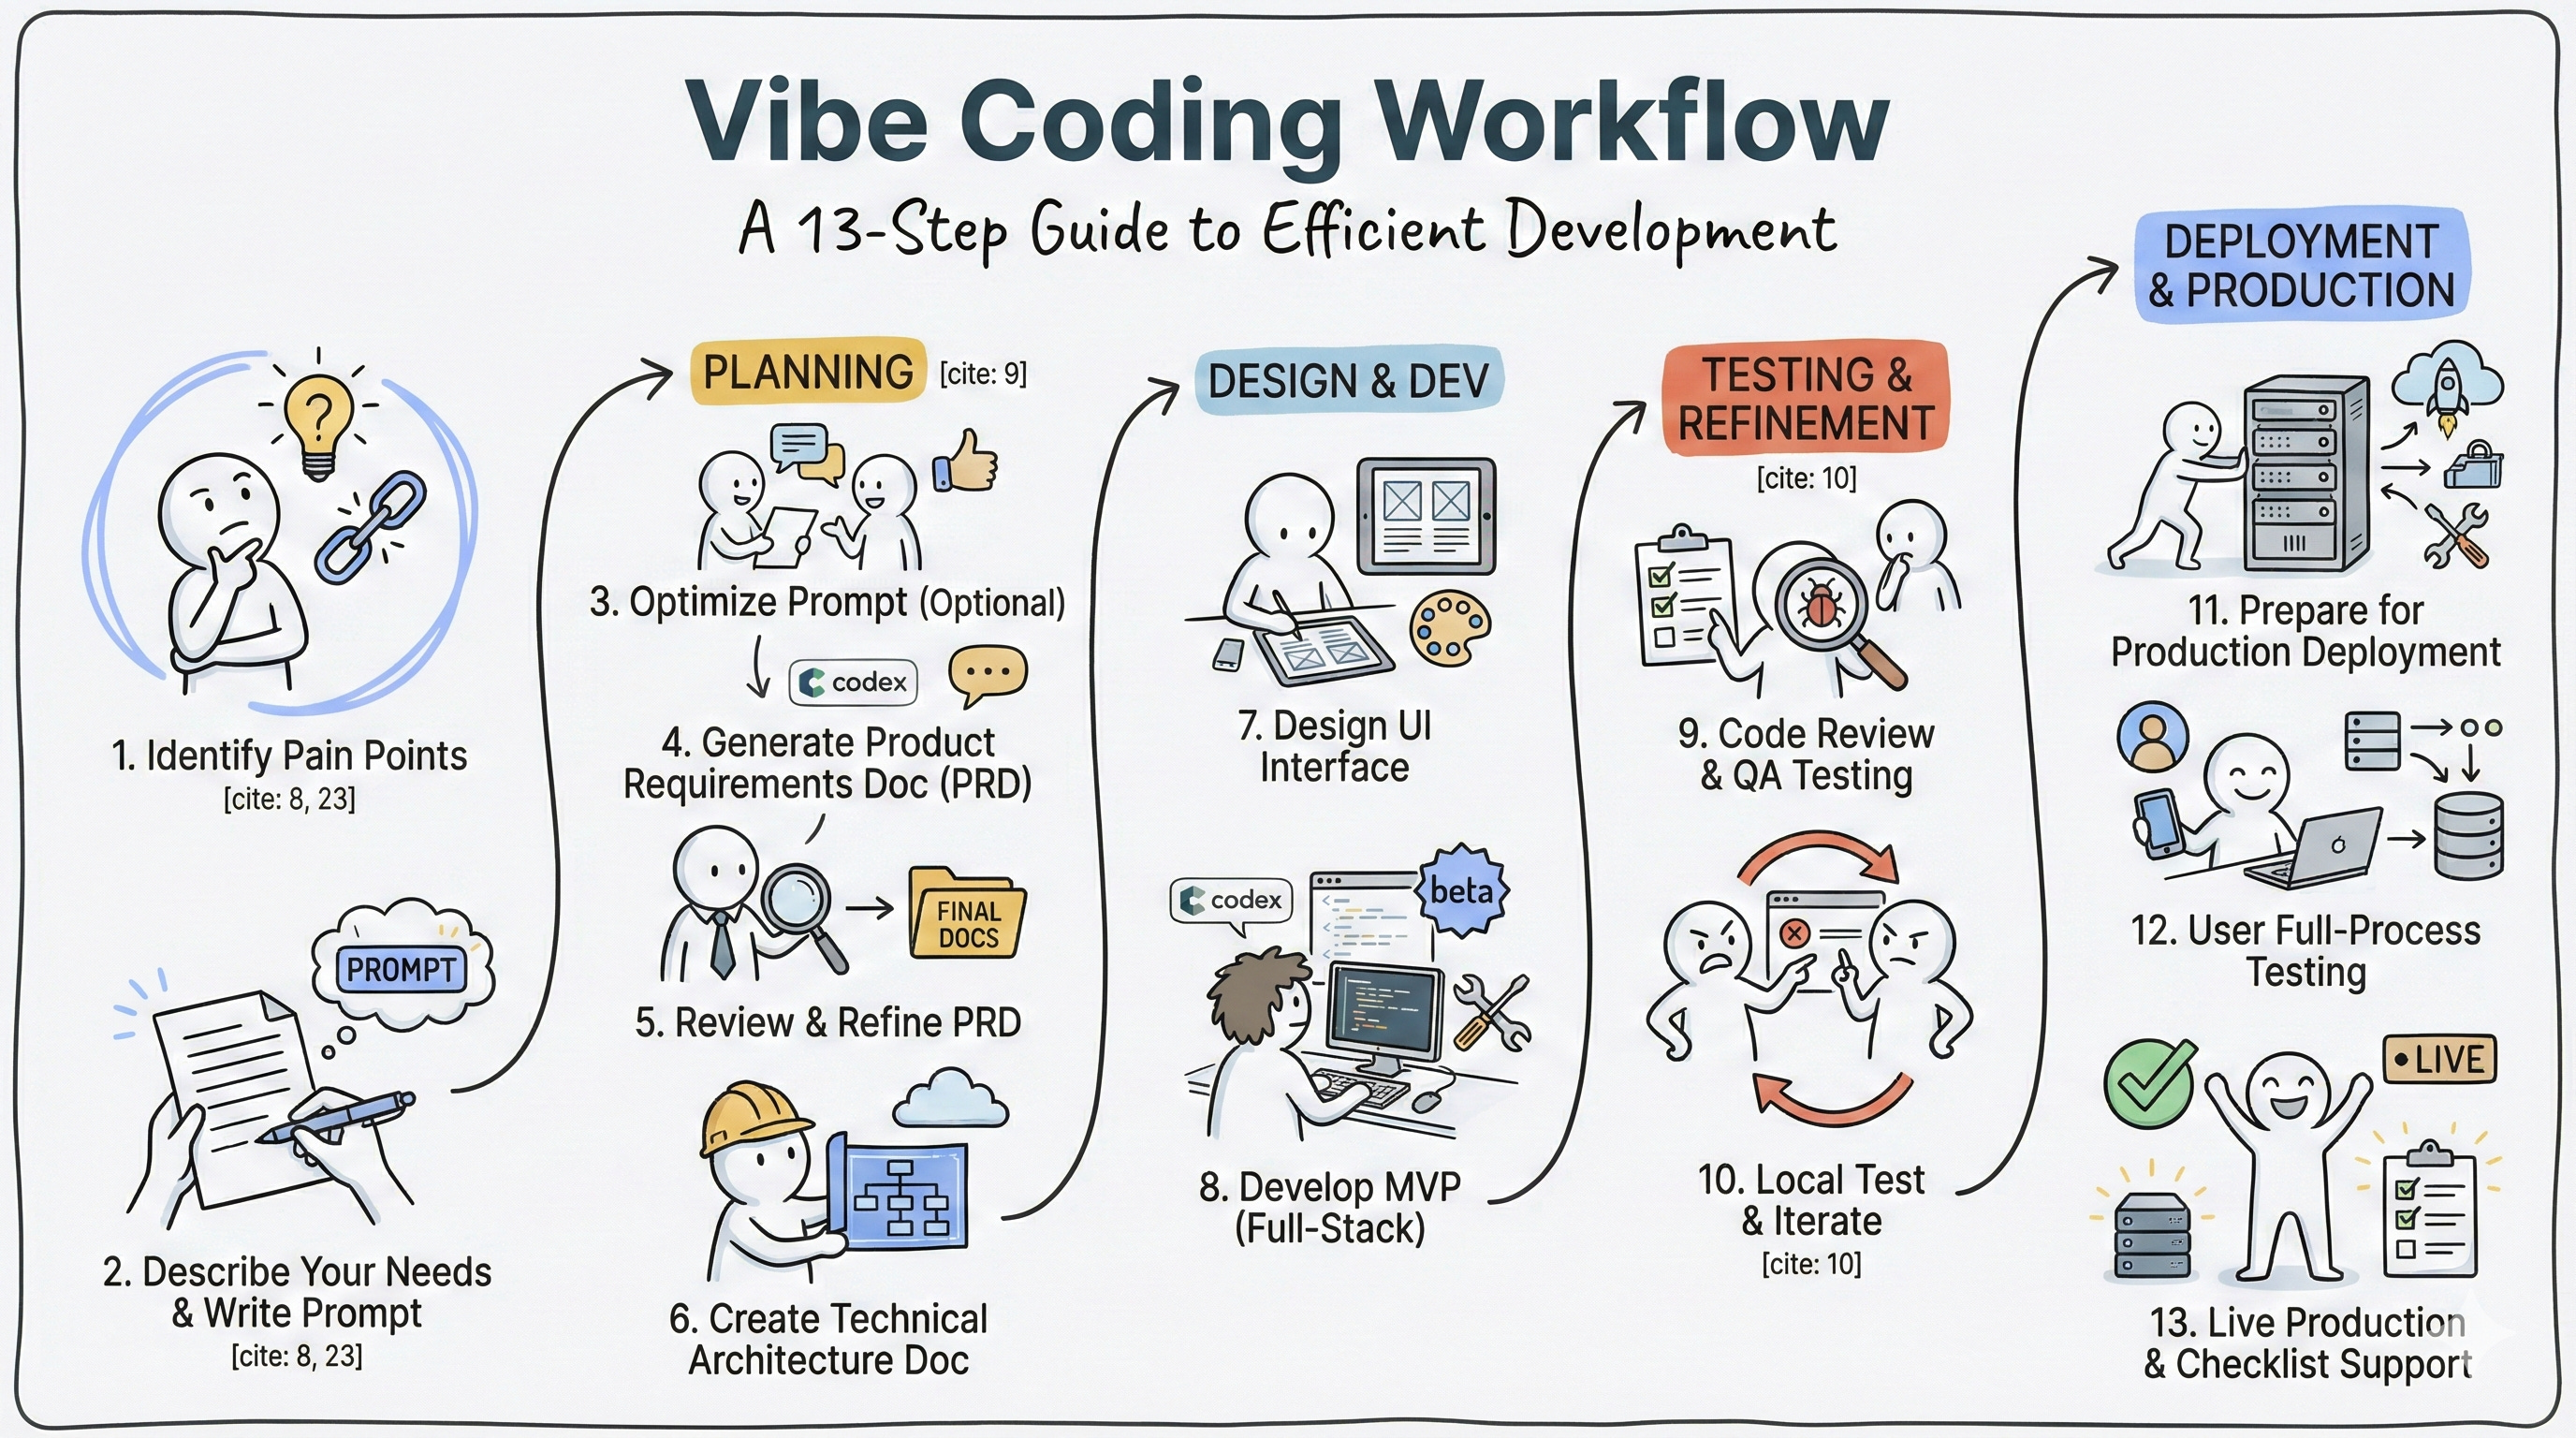
Part 1: Planning Before Prompting
Most people jump straight to prompting. That’s a mistake. Here’s the workflow I used:
Step 1 - Document the Need
I wrote out my requirements in plain language first:
I want to develop a document translation and layout optimization tool. The requirements are briefly described as follows:
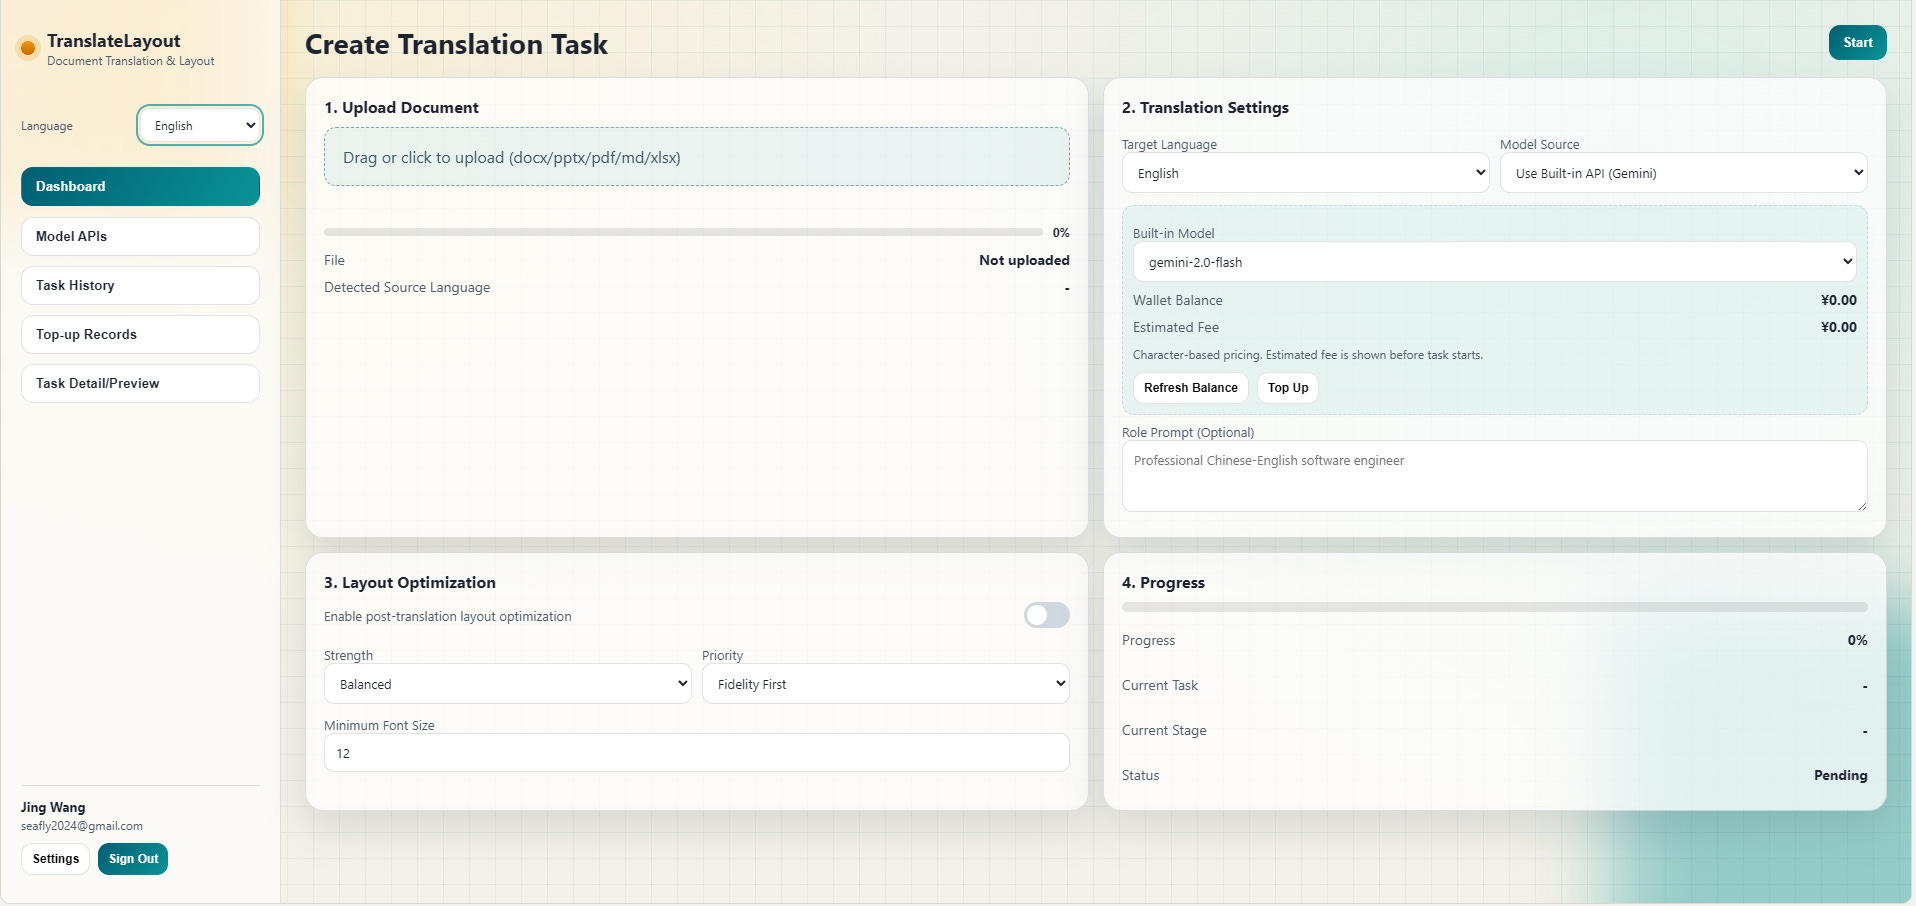
1. Users can upload documents (including docx, ppt, pdf, markdown, excel, etc.), with support for automatic source language detection
2. Users can select the target translation language
3. Users can configure the translation model themselves, including Google Translate, Kimi, Minimax, Claude, Google, OpenAI, etc. Users only need to select the model from a dropdown, and the backend will automatically match the corresponding API endpoint.
4. Users can enter their own API Key
5. Users can configure the translation role (optional step). For example, "professional Chinese-English computer programmer"
6. Option: Whether to optimize layout after translation. If users check this, the backend can support document layout optimization based on the target language after translation, especially for PPT format where text boxes may overlap after translation to different target languages - this can be optimized
7. Finally, users click a button to start translation
8. During translation and layout optimization, a progress bar displays the progress
9. After task completion, users can preview the results
10. Finally, users can download the result in their desired format, with the output file format remaining the same as the original input format
11. A complete frontend and backend application is needed, with a login page, main page after login, model API management page, historical tasks page, etc.Step 2 - Optimize the Prompt (Optional)
You can skip this, but I ran my requirements through Claude to sharpen the language. The model helped clarify edge cases and improve specificity.
Step 3 - Generate Product Requirements Document
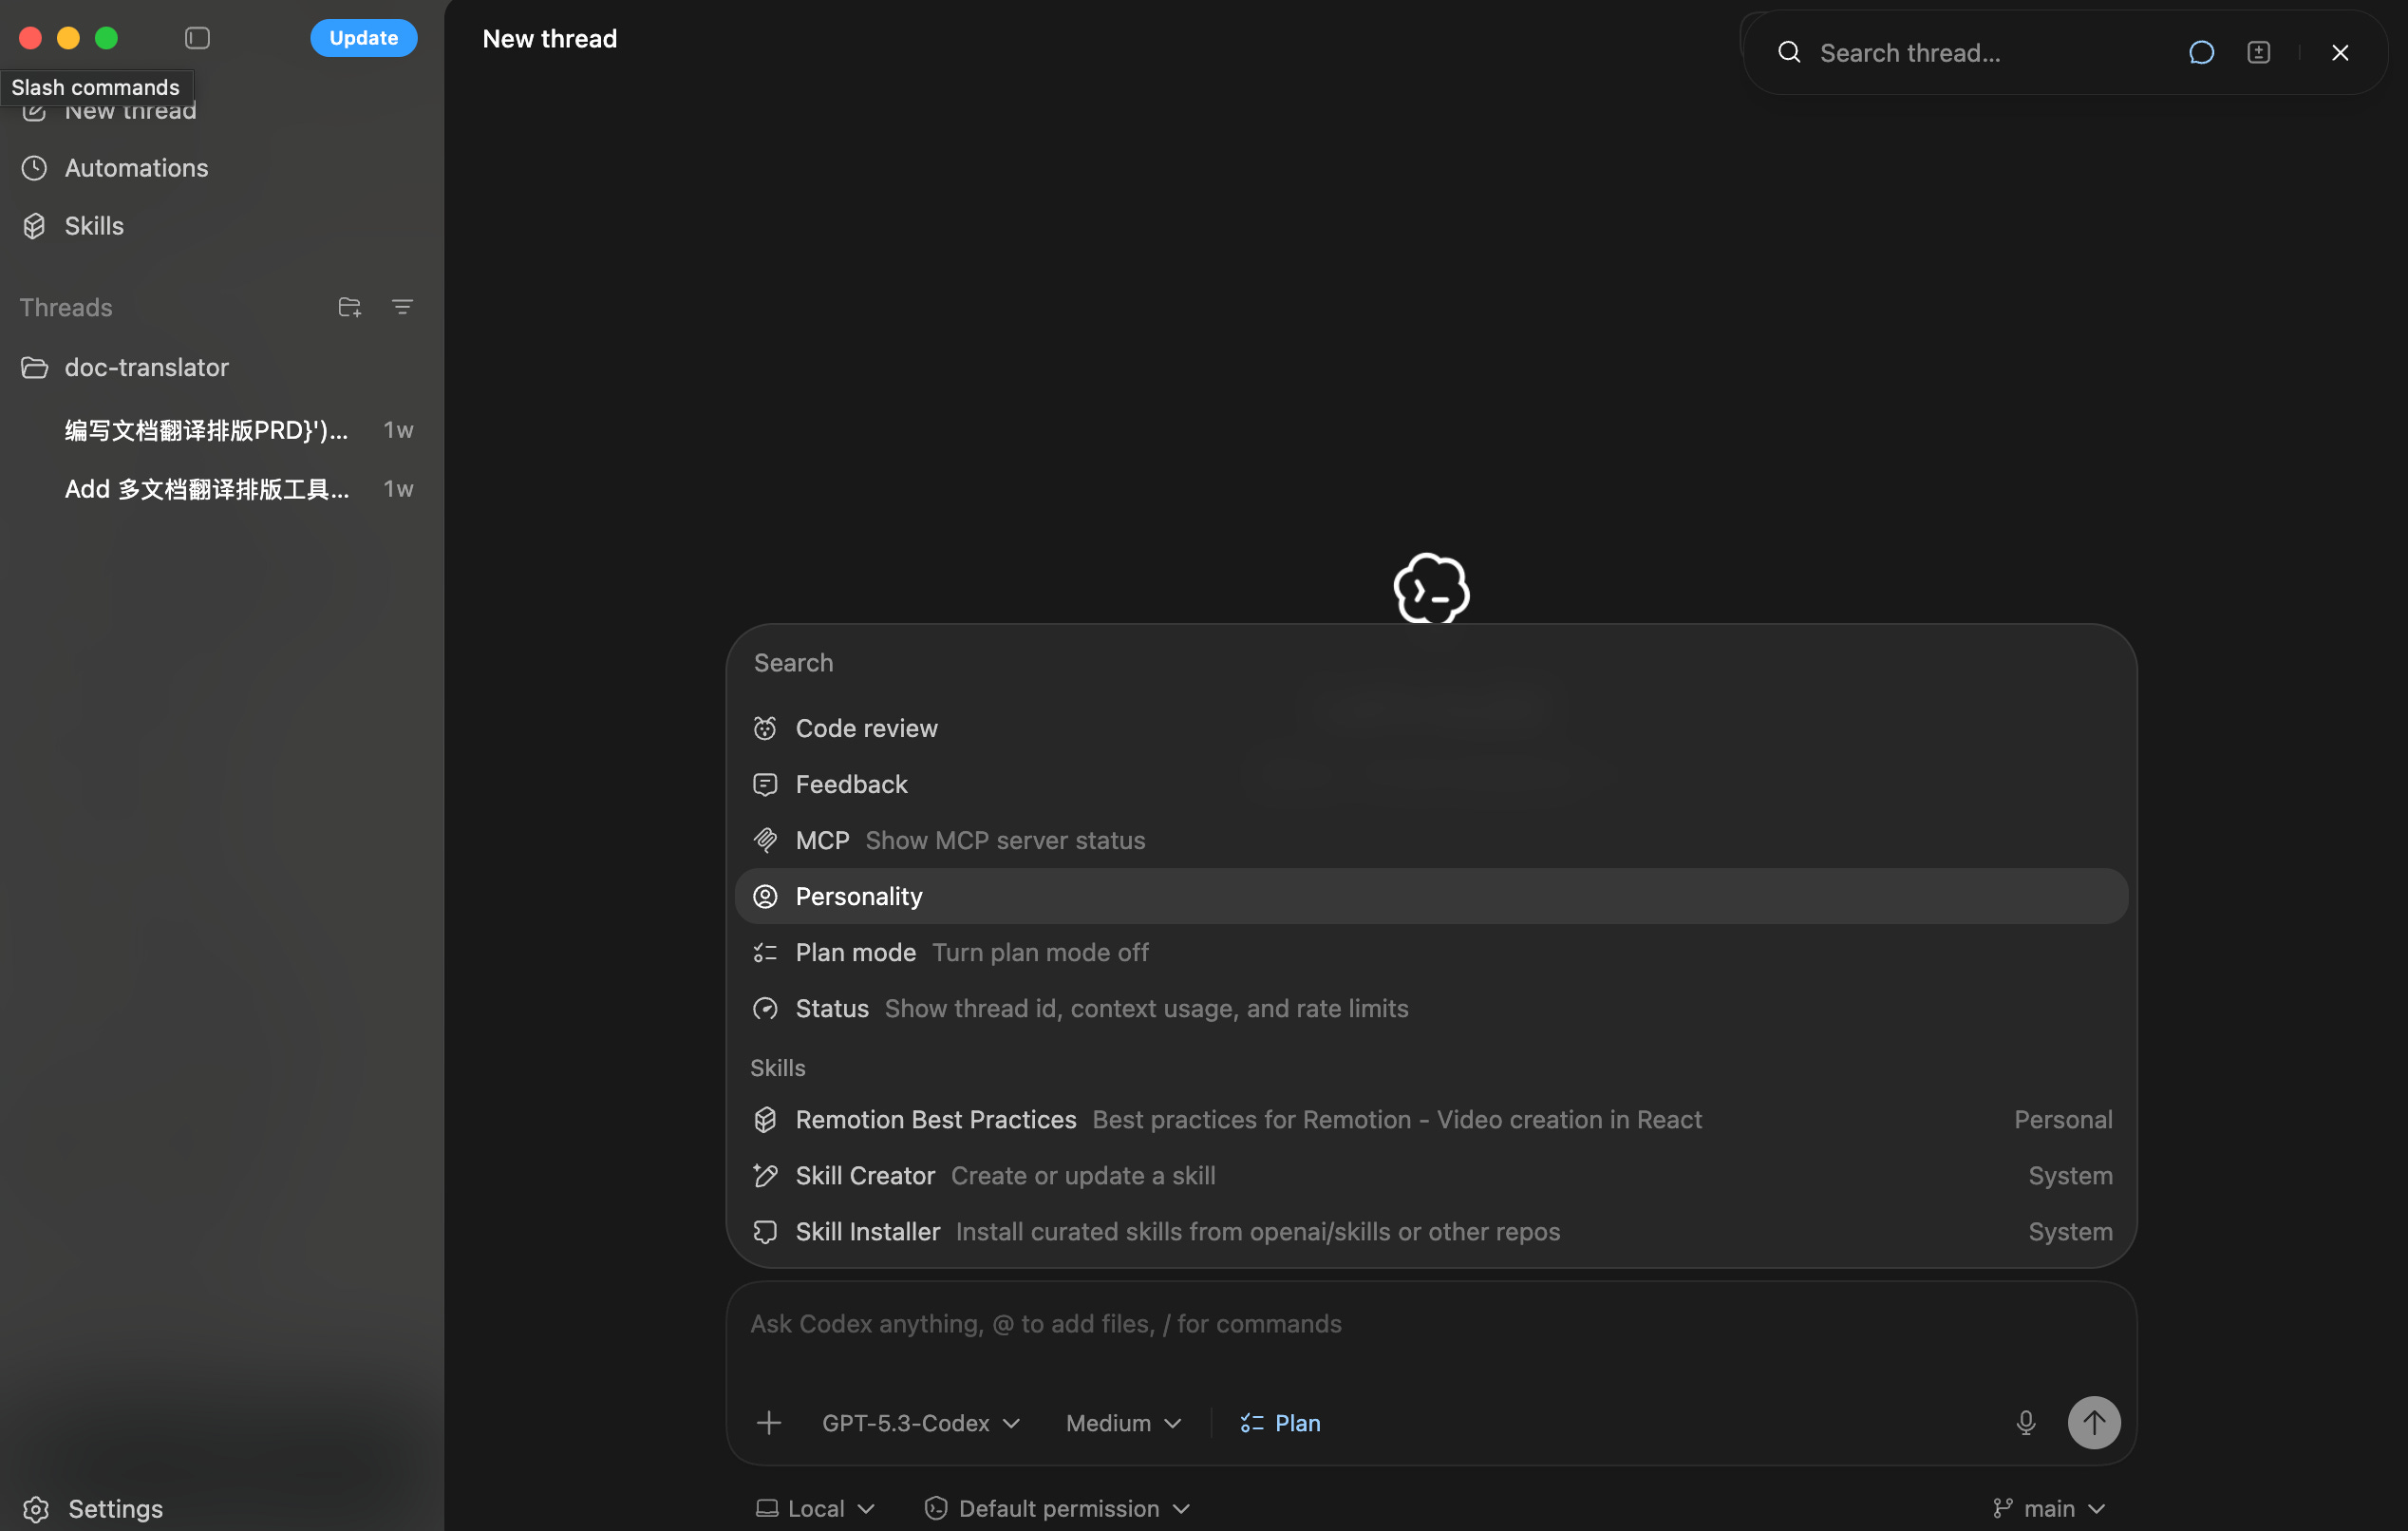
In Codex, I entered /plan to activate planning mode. I prompted:
Act as a product manager. Based on these requirements, create a complete product requirements document.
After the first version, I asked: “Any optimization opportunities?” Then had it save the refined PRD to a file.
Step 4 - Create Technical Architecture
Next prompt:
Act as a solutions architect. Write a technical architecture document based on this PRD.
Again: first version → ask for improvements → save to file.
Step 5 - Design the UI
Act as a UI designer. Design frontend UI screens based on the PRD.
At this stage, you can add skills to Codex to make it more specialized in specific areas. Skills are prompt templates that give the model domain expertise.
Part 2: Building the MVP
Step 6 - Initial Development
Act as a full-stack engineer. Develop according to the PRD, technical documentation, and UI designs.
The key here: you’re not asking for the entire application in one shot. You’re setting context with the planning documents you created earlier.
Step 7 - Preview and Test
After initial development, preview the application. You can skip previewing and go straight to testing:
Act as a QA tester and code reviewer. Perform full-stack code review and comprehensive testing. Fix issues as you find them.
Step 8 - Local Testing and Iteration
Run the application locally following the deployment instructions. Document every bug and missing feature. Then iterate:
Test feature X
Document issue
Prompt: “Fix issue Y in the authentication flow”
Test again
This cycle repeats until the MVP works locally.
Part 3: Production Deployment
Step 9 - Production Transformation
Transform this application for production deployment. Provide deployment instructions.
The model will guide you through:
Environment variable configuration
Database setup
External service integration
Deployment platform selection
Step 10 - External Tools Integration
Here’s my production stack:
Vibe Coding: Codex GPT-5.3-Codex (Medium/High)
Login OAuth: Google, Microsoft
Frontend Deployment: Vercel (supports both frontend and backend for small projects)
Backend Deployment: Render
Payments: Stripe
Domain: Namecheap
Database: Supabase (managed PostgreSQL)
Analytics: PostHog
Don’t know these tools? That’s fine. Ask the model:
I’m not familiar with Vercel deployment. Search for the latest Vercel documentation and give me step-by-step deployment instructions.
The model will search current documentation and walk you through it.
Step 11 - End-to-End Testing
Act as a user. Perform complete end-to-end testing with this test data.
If you need to manually test, ask the model to generate a testing checklist.
Step 12 - Production Testing
After deployment, the model provides a production testing checklist. You run through it manually to verify everything works in the live environment.
The Real-World Difference
What I built:
Login Page: Register or use Google/Microsoft single sign-on
Translation Interface: Upload, detect language, select target language
Model Configuration: Use system models (with credits) or your own API keys
Role Customization: Set expert context (e.g., “senior supply chain digitalization expert fluent in professional Chinese and English”)
Layout Optimization: Automatically fixes text overflow and alignment issues
Task Management: Preview results before download, view translation history
The layout optimization is crucial. Without it, every translated PPT needs 30+ minutes of manual adjustment. With it, most slides work immediately.
Vibe Coding Lessons Learned
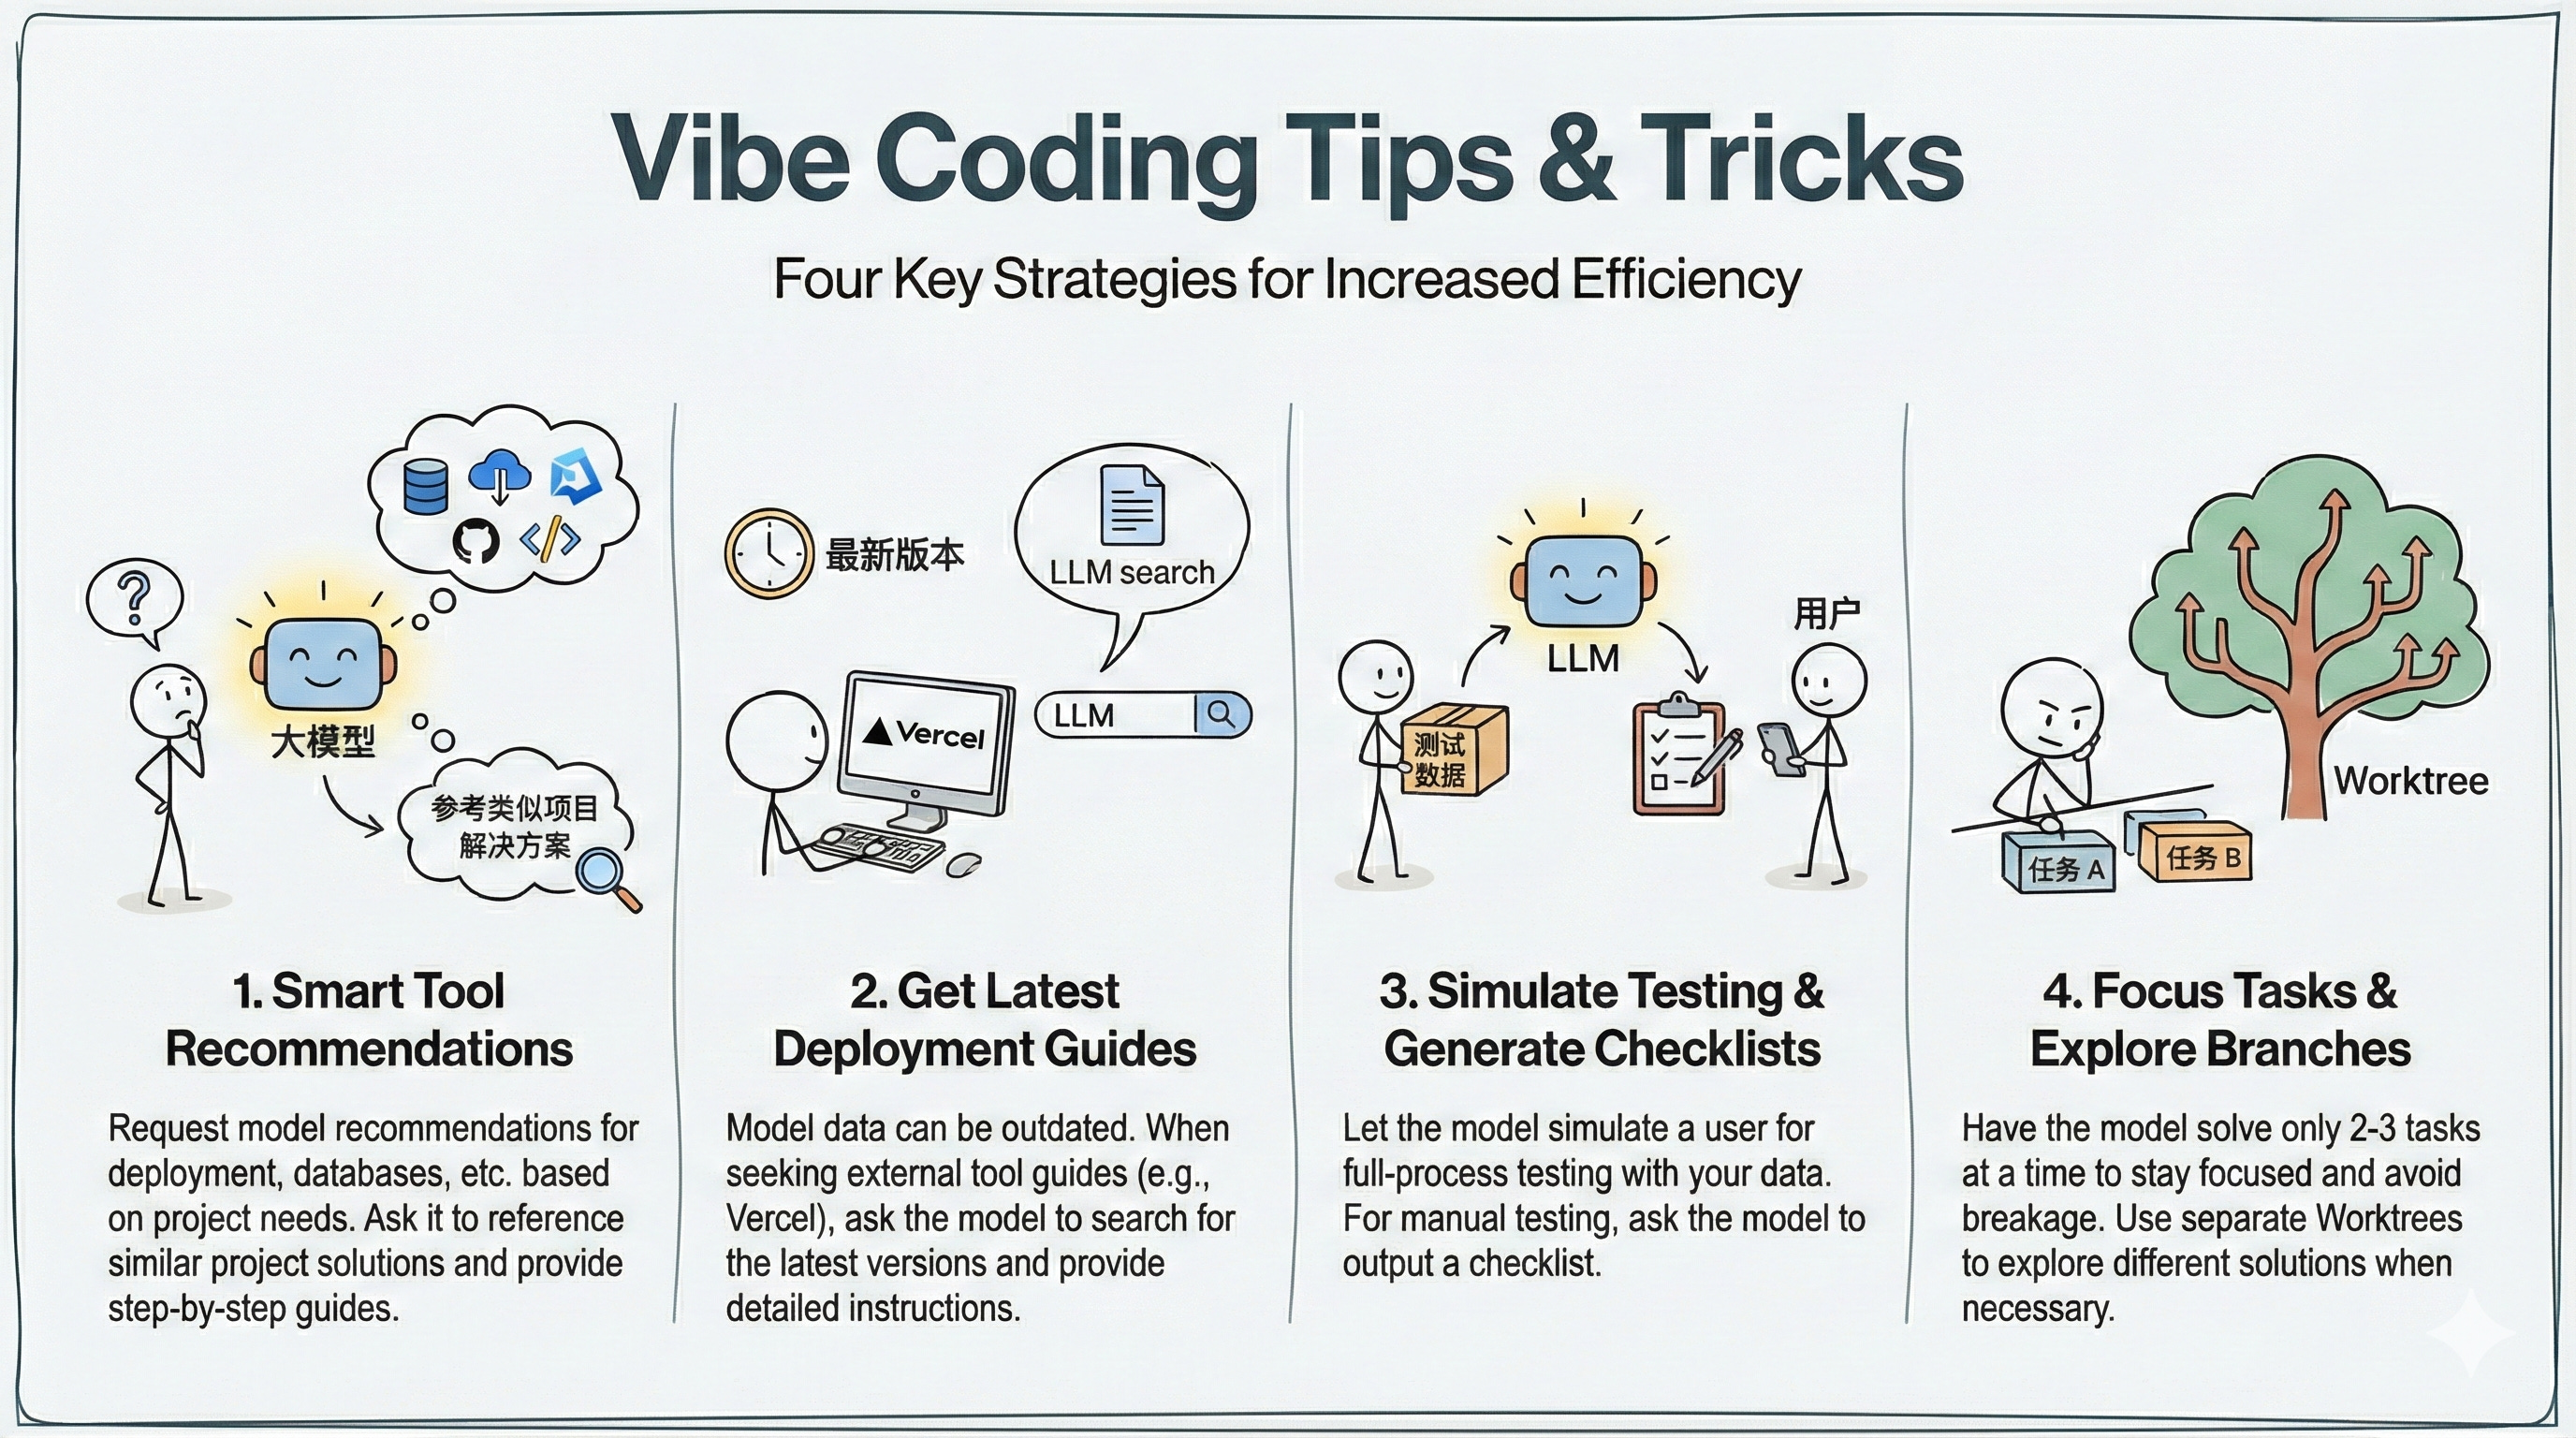
1. Let the Model Research Tools for You
When exploring deployment options or database choices, prompt:
Reference similar projects and recommend tools based on community solutions.
You don’t need prior experience. The model synthesizes from successful implementations.
2. Search for Latest Documentation
Model training data is historical. For current platform instructions:
Search for the latest Vercel documentation and provide detailed deployment steps.
This gets you current instructions, not outdated workflows.
3. Simulate User Testing
Simulate a user testing this application with the provided test data. Perform complete end-to-end testing.
When you need manual testing, ask for a checklist instead.
4. Solve Problems in Small Batches
Don’t prompt: “Fix everything.” Instead: “Fix these 2-3 issues.” The model stays focused and is less likely to break working code.
When exploring different solutions, use separate git worktrees to test approaches in parallel without contaminating the main branch.
5. Follow Standard Project Workflow
The entire process mirrors traditional software development:
Requirements gathering
Product documentation
Technical architecture
UI design
Development
QA testing
Local deployment
Production deployment
User acceptance testing
The difference: you’re coordinating with an AI instead of a team.
What’s Next
The workflow works because it breaks complex projects into clear phases. Each phase has a defined role (PM, architect, engineer, QA) and produces specific artifacts (PRD, technical specs, code).
This isn’t magic. It’s systematic project management applied to AI tooling.
If you have repetitive work that could be automated, try this workflow. Start small. Document your requirements clearly. Let the model handle implementation details while you focus on product direction and testing.
The gap between “I have an idea” and “I have a deployed product” is narrowing. The constraint isn’t coding ability anymore. It’s knowing what to build and how to break it down into manageable pieces.
Want to try translayout? It’s live now. If you’re translating documents regularly and need layout optimization, especially for PowerPoint, it might solve your workflow pain points.